Marineland Magniflow Canister Filters

Marineland Magniflow Canister Filters
Additional sizes may be available!
Additional sizes may be available! Email me when available|
Product Notes:
· We cannot ship this product to Alaska. |

Overview
| * | Powerful, complete 3-stage filtration for fresh and saltwater aquariums |
| * | Maintains clean, healthy filtered water for aquariums up to 100 gallons |
| * | Fast, convenient setup/maintenance for aquarium success made easy |
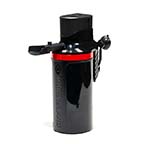
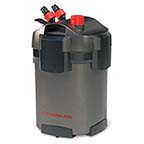
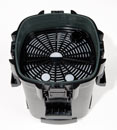
Powerful 3-stage canister with easy-access design keeps set up and maintenance simple and convenient. Marineland Magniflow Canister Filters feature a clever canister lid (motor head) design with top sealing gasket for easy access to media baskets while maintaining a better seal. Media included for immediate startup. For fresh or saltwater aquariums.
Advanced Features:
- Canister Lid: Press down to ensure water-tight seal and lift up for easy cover removal
- Stack N' Flow Filter Media Trays: Flow-through media layers for total mechanical, chemical and biological filtration
- Quick Prime Button: Fills filter chamber with water for self-priming system startup
- Valve Block for Quick Release: Immediately shuts down water flow and separates from motor housing for quick, spill-free filter maintenance
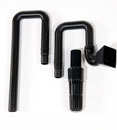
Includes: Polishing filter-floss pad, filter foam, carbon filter bag, bio-filter balls, inlet/outlet assembly and tubing and ceramic bio-filter rings (except Model 160).
| Specifications | |||
| Model | Gallons Per Hour | Aquarium Capacity | Dimensions |
| 160 | 160 gph | Up to 30 gallons | 12.2" x 9.17" x13.62" high |
| 220 | 220 gph | Up to 55 gallons | 12.2" x 9.17" x 16.25" high |
| 360 | 360 gph | Up to 100 gallons | 14" x 11.02" x 18" high |
Installation Steps:
- Begin by turning the Motor Head upside down and starting at the corner with the intake Pipe, place the Rubber Seal into the channel that defines the Motor Head perimeter.
- Gently guide the Rubber Seal into the channel. It will need to be stretched slightly as you proceed around the Motor Head.
- Inspect the installation to be sure the Rubber Seal is fully seated into the channel and not twisted or pinched.
Quick Setup Guide
- Check to make sure all parts are included.
- Prepare Canister
- Unlock and remove Motor Head.
- Unwrap all media. Rinse thoroughly.
- Place media in appropriate Filter Trays. Load filled Filter Trays and Securing Plate. IMPORTANT: Arrow on handle should align with filter case.
- Replace Motor Head. Close Locking Buckles. NOTE: Align Intake Nozzle and Connector Pipe.
- Attach Valve Block to Motor Head. The inlet will be on the right and outlet on the left. To lock the Valve Block, turn the Key clockwise and reverse to unlock.
- Turn Key
- Press Key down
- Close key cover
- Placement
- Place canister filter under aquarium in an acceptable location. Top of the canister must be below aquarium water level. DO NOT PLUG IN.
- Make sure distance from bottom of filter and top of aquarium falls within these ranges:
- Model 160: 20-60 inches
- Model 220: 24-60 inches
- Model 360: 32-60 inches
- Intake/Outlet Assembly
- Attach Strainer and Suction Cups (2) to Intake Tube. Moisten Suction Cups and press Intake Tube into position on inside wall of aquarium.
- Attach Elbow, Diffuser, and Suction Cup (1) to Outlet Tube. Moisten Suction Cup and press Outlet Tube into position on outside wall of aquarium.
- Connection
- Attach Vinyl Tubing Ends to Valve Hose Barbs. Tighten Hose Nuts. Please make sure you have pushed the vinyl tubing down onto the Hose Barbs as far as possible to help make sure the Hose Nuts tighten properly.
- Extend hoses to highest barbs on aquarium Intake and Outlet Tubes. Allow for two inches of slack. Cut hoses to fit. Make sure you cut in a straight, smooth line with either Tubing Cutters or a sharp knife. Attach hoses to Intake and Outlet tubes. Place Snapper Clamps around hose and tubes at fittings. Tighten Snapper Clamps.
- Start Up
- Press the Quick Prime Button multiple times until water starts to flow into canister and back up towards the aquarium.
- Plug in the filter.
- NOTE: Create a Drip Loop for safety.
- NOTE: If water flow through Diffuser is not satisfactory, unplug and check hose connections for obstructions or kinking.
- NOTE: A slight rattling noise is normal ONLY DURING STARTUP. If noise persists, shut off filter and check for dirt or debris that may be in bottom of Canister.
Filter Maintenance
To perform routine maintenance on your canister filter, you should first unplug your filter. There is no need to remove the Intake and Outlet Tubes or disconnect hosing from the Valve Block. All you need to do is remove the Valve Block from the canister filter. To do this first stop the water flow to the filter by lifting the Key Cover on the Valve Block. To unlock the Valve Block, turn the Key inside counterclockwise. Lift the Valve Block from the canister, leaving the Intake/Outlet Assembly Tubing and Valve Block together for easy reconnect.- Clean filter media regularly. Rinse with water from aquarium, NOT TAP WATER.
- Clean Impeller Assembly Cover and Impeller monthly. Rinse thoroughly under warm tap water.
- Rinse Filter Foam every three weeks and replace after nine weeks.
- Replace Filter Floss Pad and Carbon Filter Bag every month.
Included Media
- Filter Floss Pad: Water polishing pads for increased water clarity. The polishing filter pad acts as a water polisher, removing fine debris. Replace every three weeks. Do not clean with soaps or abrasives.
- Biological Filtration: The Bio-Filter Balls and Ceramic Rings provide a large multi-faceted surface area for the growth of beneficial ammonia-neutralizing bacterial responsible for biological filtration.
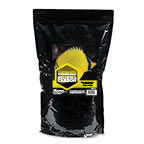
- Chemical Filtration: Inside the Carbon Filter Bag, Black Diamond Premium Activated Carbon removes odors discoloration and water impurities. Replace Carbon Filter Bag monthly since carbon deactivates with use.
- Mechanical Filtration: The filter foam pads screen out dirt and debris. Marineland filter foam should be cleaned and rinsed every three weeks and replaced every nine weeks. Do not clean with soaps or abrasives.
| Model | # of Media Baskets |
Filter Foam |
Carbon Bags |
Bio-Balls | Ceramic Rings |
| 160 | 3 | 2 | 2 | Yes | No |
| 220 | 4 | 2 | 2 | Yes | Yes |
| 360 | 4 | 2 | 3 | Yes | Yes |