


Additional sizes may be available!
Additional sizes may be available! Email me when available
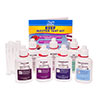
Overview
| * | Easy and accurate reef test solutions for calcium, carbonate hardness, phosphate, and nitrate |
| * | Lets you monitor and maintain ideal reef aquarium conditions |
| * | Easy to use - simply match color of test solution against color chart |
This easy-to-use liquid test kit helps you adjust your water parameters for the success of your reef aquarium. Measures four essential water parameters. Long-lasting kit contains tests for calcium (about 70 tests), carbonate hardness (number of tests varies by water hardness), phosphate (about 150 tests), and nitrate (about 110 tests). Included instructions explain how to use the tests in an easy-to-understand manner for precise test results. Kit contents: 7 test bottles, instruction booklet, 4 glass test tubes, and a color chart. Refills available for Calcium & Carbonate Hardness, Phosphate, and Nitrate.
Saltwater Master Test Kit available for general marine aquarium testing.
Warning: Several of the included solutions are harmful and require precautions to be taken for your safety. Please make sure to read included instruction manual before working with these solutions.
Calcium Test Instructions
Why Test for Calcium?
Monitoring calcium levels is essential for keeping a successful reef aquarium. Reef organisms use calcium to build a calcium carbonate skeleton. Over time, as the calcium in the water is used up, the calcium level will gradually drop. Calcium must be present for corals to grow. Even reef invertebrates, such as shrimp, crabs, mollusks, and encrusting algae require calcium to grow and remain healthy.
Calcium level drops as it is used by invertebrates or as it reacts with excess phosphate. Making a partial water change may help to maintain proper calcium levels, depending on the brand of salt mix. Special calcium additives are also available. Elevated phosphate precipitates calcium, rendering it unavailable to reef organisms. Phosphate enters the aquarium from tap water and as a byproduct of fish and invertebrate metabolism. If necessary, remove excess phosphate. However, just having an adequate calcium level is not enough to achieve healthy coral growth, because the growth of corals is directly linked to carbonate hardness (KH), often referred to as alkalinity. All reef organisms rely on the combination of calcium and carbonate to build their skeleton structure by extracting these substances from saltwater. These two building blocks are essential for the growth of corals, crustaceans, mollusks, coralline algae and calcareous forms of macroalgae. Testing for both carbonate hardness and calcium is essential for successful reef keeping.
Testing Tips
This test kit reads the calcium concentration in milligrams per liter (mg/L), which is equivalent to parts per million (ppm).
Directions for Testing Calcium Levels
Read instructions thoroughly before testing. Do not allow test solutions to get into aquarium. To remove childproof safety cap: With one hand, push red tab left with thumb while unscrewing cap with free hand.
- Rinse a clean test tube with the water being tested.
- Fill the test tube to the line with 5 ml of aquarium water.
- Holding the bottle vertically, add 10 drops of Calcium Test Solution #1 to the test tube, cap and shake for 10 seconds.
- Shake Calcium Test Solution #2 bottle vigorously for 10 seconds.
- Holding the bottle vertically, add Calcium Test Solution #2, drop by drop to the test tube until the solution changes from pink to the blue endpoint. Each drop is equivalent to 20 mg/L calcium. Cap and shake the test tube between drops. Be sure to count the drops added.
- A pink color should form after the first drop.
- If a blue color forms after the first drop, the calcium concentration is 20 mg/L or below.
- As the endpoint is approached, the color will usually change from pink to purple finally changing to blue. After the purple color forms, only one or two more drops should be required to reach the blue endpoint.
Interpreting the Test Results
Reef aquariums should have a calcium concentration between 400-500 mg/L.
Increasing Your Calcium Levels
There are two ways to increase your calcium level. One is when you make up new saltwater and perform routine water exchanges. The amount of calcium is dependent upon the salt mix that you use. The second method is to add a product that is designed specifically to increase the calcium level in your aquarium.
Carbonate Hardness Test Instructions
What is Carbonate Hardness?
Carbonate hardness (also known as alkalinity) is the measure of carbonate and bicarbonate ion concentrations dissolved in water. These minerals are present in municipal, well, and bottled spring water. The level of carbonate hardness in tap and bottled water depends on the source of the water and the treatment process it has undergone. Carbonate hardness helps stabilize pH in the aquarium. An aquarium with a low KH level (50 ppm or less) will tend to be acidic. Aquariums with very low KH are subject to rapid pH shifts, if not monitored carefully. Water with a high KH level (>200 ppm) usually has a high pH. This test measures KH in German degrees (dKH). To convert to ppm, multiply dKH by 17.9.
Directions for Testing Carbonate Hardness Levels
Read instructions thoroughly before testing. Do not allow test solutions to get into aquarium.
- Rinse a clean test tube with water to be tested.
- Fill the test tube to the line with 5 ml of aquarium water.
- Add KH Test Solution, one drop at a time, holding dropper bottle upside down in a completely vertical position to ensure uniformity of drops. After first drop is added, the solution will turn pale blue. If the water sample contains 1 dKH or less, the solution will turn from clear to pale yellow after the first drop is added.
- Cap the test tube and invert several times after each drop. Keep count of the drops being added. Do not hold finger over open end of the tube, as this may affect the test results.
- The test is completed when the water in the test tube, after having been shaken, turns from blue to yellow. If you have difficulty discerning the color after the first drop of test solution is added, remove the cap and while holding it over a white background, look down through the tube.
- The Carbonate Hardness value is determined by the number of drops of the reagent that must be added to turn the water bright yellow. Each drop is equal to 1 dKH or 17.9 ppm KH (see Conversion Chart in instruction manual).
KH in the Aquarium
Aquarists seek to provide a healthy aquarium environment by duplicating the water conditions of the natural habitats of their fish and invertebrates. Freshly made salt mix should have adequate KH, typically between 8-12 dKH.
Increasing KH
Over time, KH will decrease. Partial water changes can increase KH. KH can also be increased with API pH buffers. Proper pH 8.2 is a carbonate buffer suitable for marine aquariums.
Phosphate Test Instructions
Why Test for Phosphate?
Phosphate enters the aquarium from fish and invertebrate waste and decaying organic matter, such as dead algae and uneaten fish food. Water treatment facilities may add phosphate to tap water to prevent pipe corrosion and reduce concentrations of heavy metals in drinking water. Some salt mixes also contain phosphates.
In reef aquariums, phosphate precipitates dissolved calcium and magnesium ions, inhibiting the growth of hard corals and other reef-building organisms.
Testing Tips
This phosphate test reads the total phosphate level in parts per million (ppm), which are equivalent to milligrams per liter (mg/L) from 0 ppm (mg/L) to 10.0 ppm (mg/L), in saltwater aquariums.
Directions for Testing Phosphate Levels
Read instructions thoroughly before testing. Do not allow test solutions to get into aquarium.
- Rinse a clean test tube with water being tested.
- Fill the test tube to the line with 5 ml of aquarium water.
- Add 6 drops from Phosphate Test Solution Bottle #1 to the test tube, holding the dropper bottle upside down in a completely vertical position to ensure uniformity of drops added to the water sample.
- Cap and shake the test tube vigorously for 5 seconds.
- Add 6 drops from Phosphate Test Solution Bottle #2 to the test tube, holding the dropper bottle upside down in a completely vertical position to ensure uniformity of drops added to the water sample. Bottle #2 has a very thick solution and may require increased pressure while squeezing to release drops.
- Cap and shake the test tube vigorously for 5 seconds.
- Wait 3 minutes for full color to develop.
- Read the test results by matching the test solution against the Phosphate Test Color Chart. The tube should be viewed against the white area beside the color chart. Color comparisons are best made in a well-lit area. The closest match indicates the ppm (mg/L) of total phosphate in the water sample. Rinse the test tube with clean water after each use.
Interpreting the Results
Ideally, the phosphate level should be zero in reef aquariums. The phosphate level in a new aquarium will depend on the purity of water used to fill it. The phosphate level in tap water can vary daily depending on the treatment process used. Phosphate tends to accumulate in established aquariums.
Reducing Phosphate
To quickly reduce phosphate levels, perform a partial water change. Remove any dirt and uneaten fish food from the bottom of the aquarium and change 25% to 50% of the water, depending on the phosphate concentration. To be sure your water source does not contain phosphate, use a tap water filter to remove all unwanted phosphate before adding water to your aquarium. To continually remove phosphate from the aquarium, use API Phos-Zorb . Phos-Zorb is a special filtration resin that removes phosphate and silicate ions from saltwater.
Nitrate Test Instructions
Why Test for Nitrate?
Nitrate is produced in the aquarium by the biological filter. Beneficial bacteria in the biological filter convert toxic ammonia and nitrite into nitrate. A high nitrate level indicates a buildup of fish waste and organic compounds, resulting in poor water quality and contributing to the likelihood of fish disease. Excessive nitrate also provides a nitrogen source that can stimulate algal blooms. In the opinion of many aquarists, maintaining a low nitrate level improves the health of fish and invertebrates in reef aquariums.
Testing Tips
This test reads total nitrate level in parts per million (ppm), which are equivalent to milligrams per liter (mg/L) from 0 ppm to 160 ppm, in either fresh or saltwater aquariums. This test measures nitrate as nitrate ion or "total nitrate." (Other tests that measure "nitrate-nitrogen" will give readings 4.4 times LESS than this test.)
Directions for Testing Nitrate Levels
Read instructions thoroughly before testing. Do not allow test solutions to get into aquarium.
- Rinse a clean test tube with water being tested.
- Fill the test tube to the line with 5 ml of aquarium water.
- Add 10 drops from Nitrate Test Solution Bottle #1, holding dropper bottle upside down in a completely vertical position to ensure uniformity of drops added.
- Cap the test tube and invert tube several times to mix solution. Do not hold finger over the open end as this may affect test results.
- Vigorously shake the Nitrate Test Solution Bottle #2 for at least 30 seconds. This step is extremely important to ensure accuracy of test results.
- Now, add 10 drops from Solution Bottle #2, holding dropper bottle upside down in a completely vertical position.
- Cap the test tube and shake vigorously for one minute. This step is extremely important to ensure accuracy of test results.
- Wait 5 minutes for the color to develop.
- Read the test results by matching the color of the solution against those on the Nitrate Test Color Chart. The tube should be viewed against the white area beside the color chart. Color comparisons are best made in a well-lit area. The closest match indicates the ppm (mg/L) of nitrate in the water sample. Rinse the test tube with clean water after each use.
What the Test Results Mean
In new aquariums, the nitrate level will gradually climb as the biological filter becomes established. Many marine aquarists prefer to keep nitrate levels as low as possible, especially when keeping invertebrates in reef aquariums.
Frequency of Testing
Regular testing for nitrate is an essential part of routine aquarium maintenance. Aquarium water should be tested for nitrate once a week to make sure the nitrate does not reach an undesirable level.
Reducing Nitrate
Partial water changes are the easiest way to lower the nitrate in a saltwater aquarium. Keep in mind, however, that the biological filter constantly produces nitrate. Also, because many tap water supplies contain nitrate, it can be difficult to lower nitrate levels by this method. A tap water filter will remove all pollutants, including nitrate, from tap water, making water changes safe and effective.